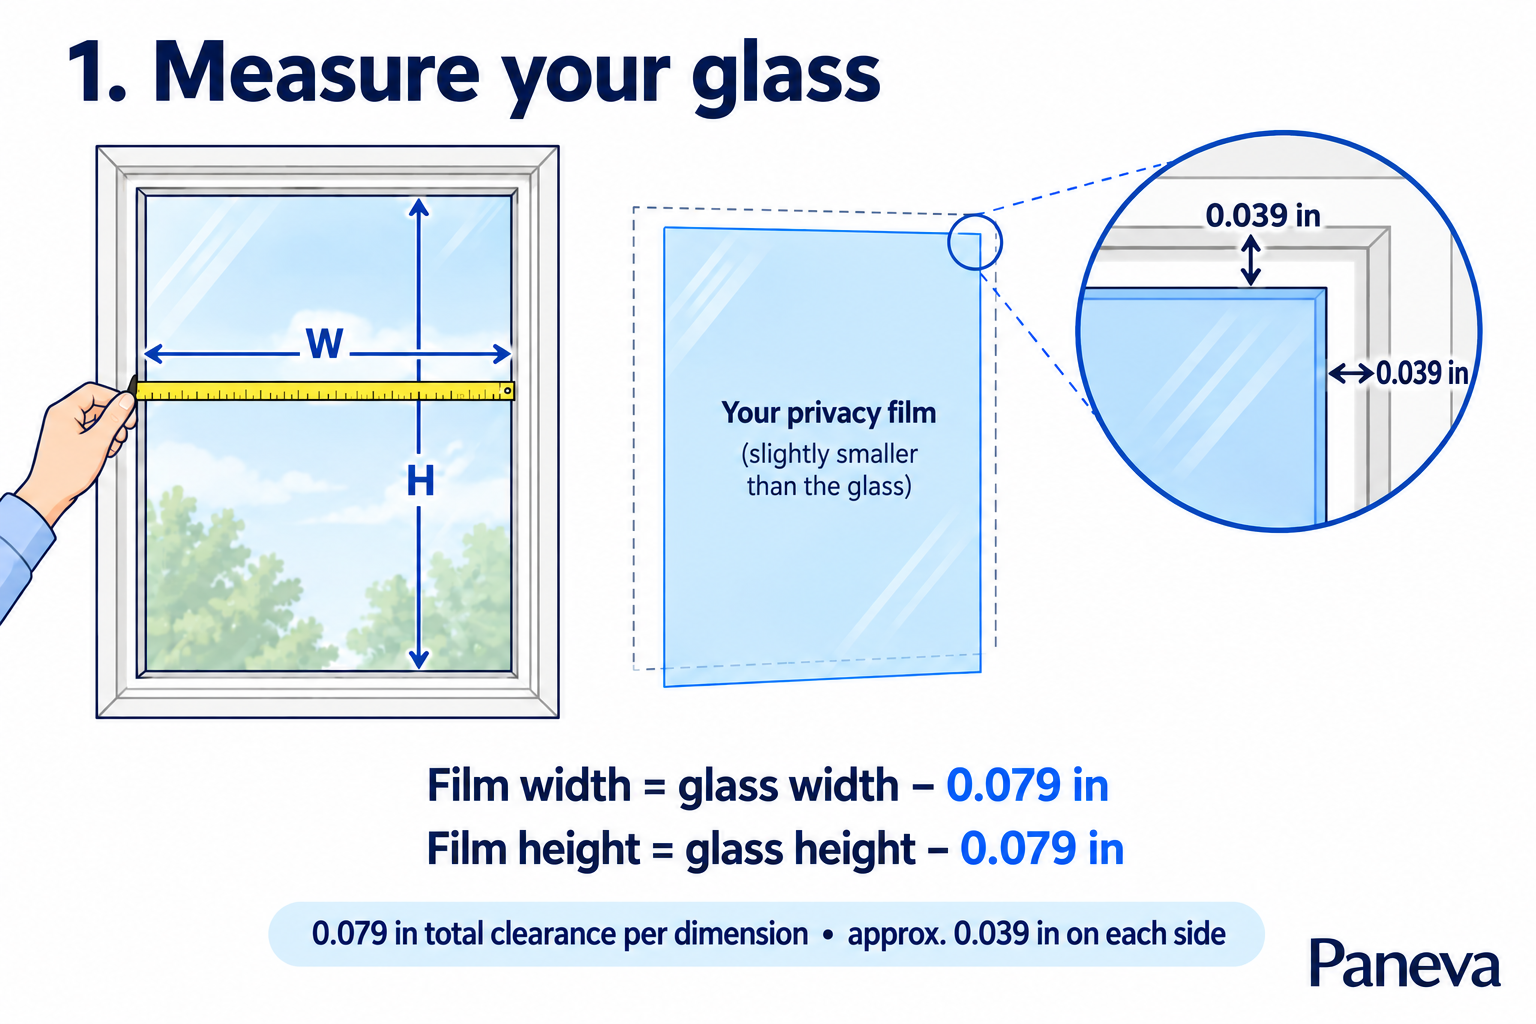
1. Measure the glass
Measure the bare glass in inches at more than one point. Plan for about 0.08 in. of total clearance so the film does not press against the frame. Confirm the busbar and cable exit before opening the liner.
INSTALLATION & CARE
Read the complete guide before removing either protective layer. Work on compatible flat interior glass in a dry, low-dust space.
Choose a video in English or Spanish, or download the current bilingual PDF.
Measure the bare glass in inches at more than one point. Plan for about 0.08 in. of total clearance so the film does not press against the frame. Confirm the busbar and cable exit before opening the liner.
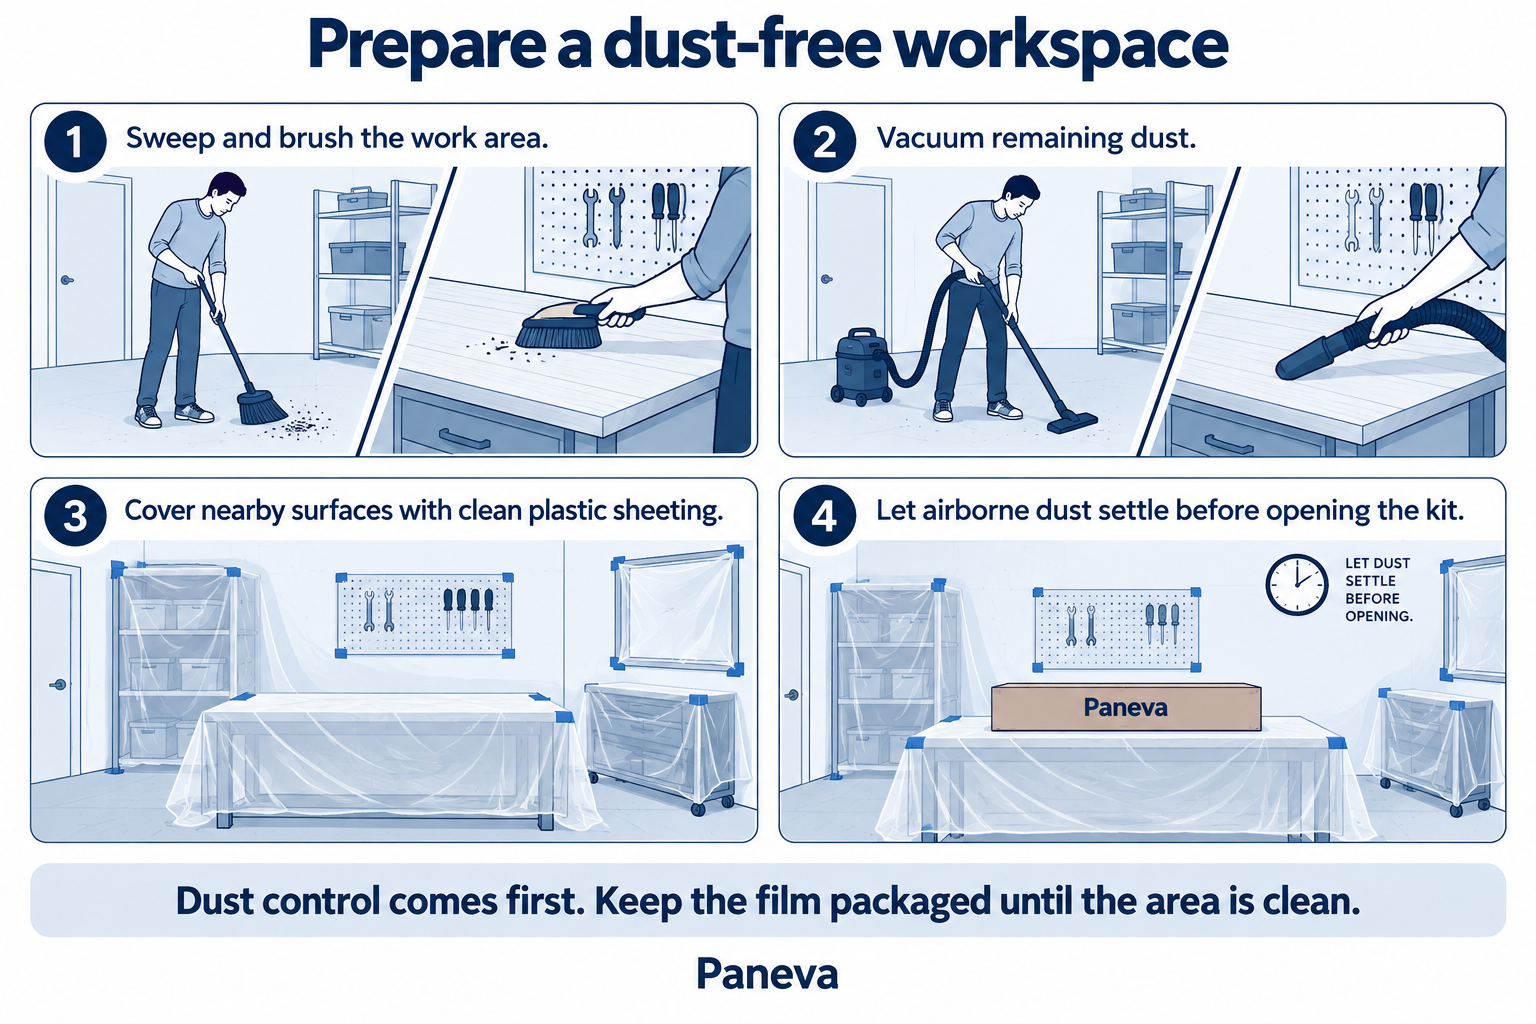
Sweep and brush the work area, then vacuum. Cover the floor and nearby surfaces with clean painter’s plastic and let airborne dust settle. Open the box near the prepared area. Wipe the rolled film with a lint-free cloth as you unroll and reroll it; keep the adhesive liner in place.
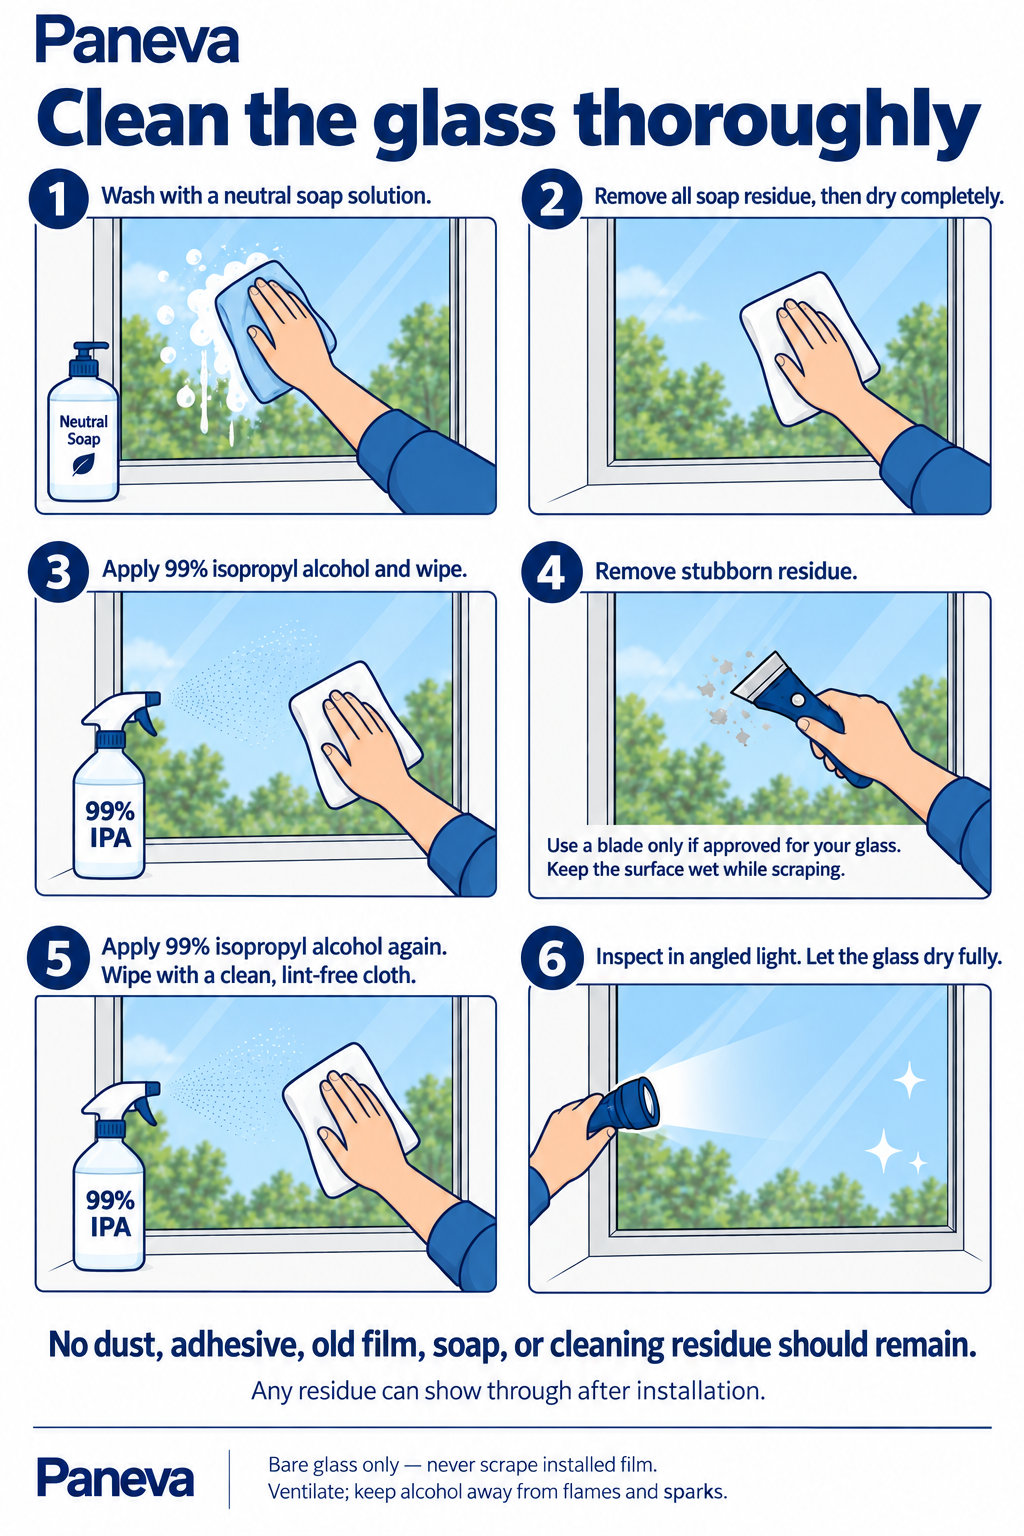
Clean the bare glass with a neutral soap solution and dry it. On bare glass only, use 99% isopropyl alcohol and a suitable glass scraper to remove adhesive and residue. Apply alcohol again and finish with a lint-free cloth. Check the entire surface under angled light. It must be completely dry and free of dust, glue and old film.
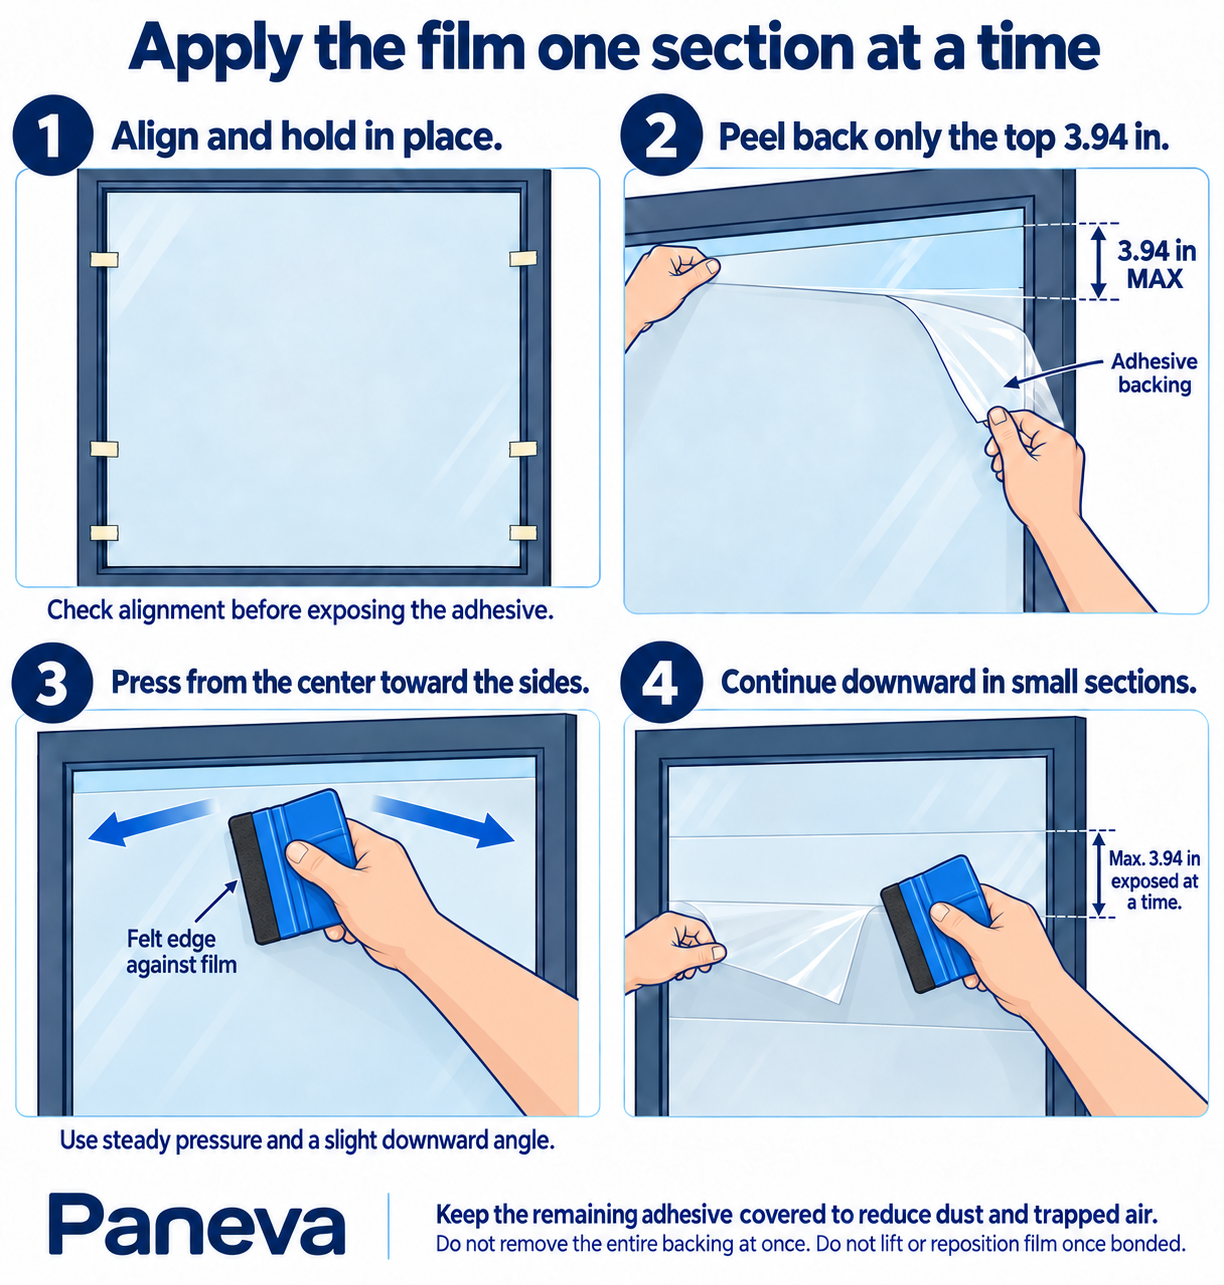
Position the film on the glass and hold it with short strips of tape. Peel about 4 in. of the adhesive liner at the top. Press the felt edge of the squeegee against the film, working from the center to both sides with a slight downward angle. Continue downward in sections of no more than 4 in. to limit dust and bubbles. Never use a blade on the installed film.
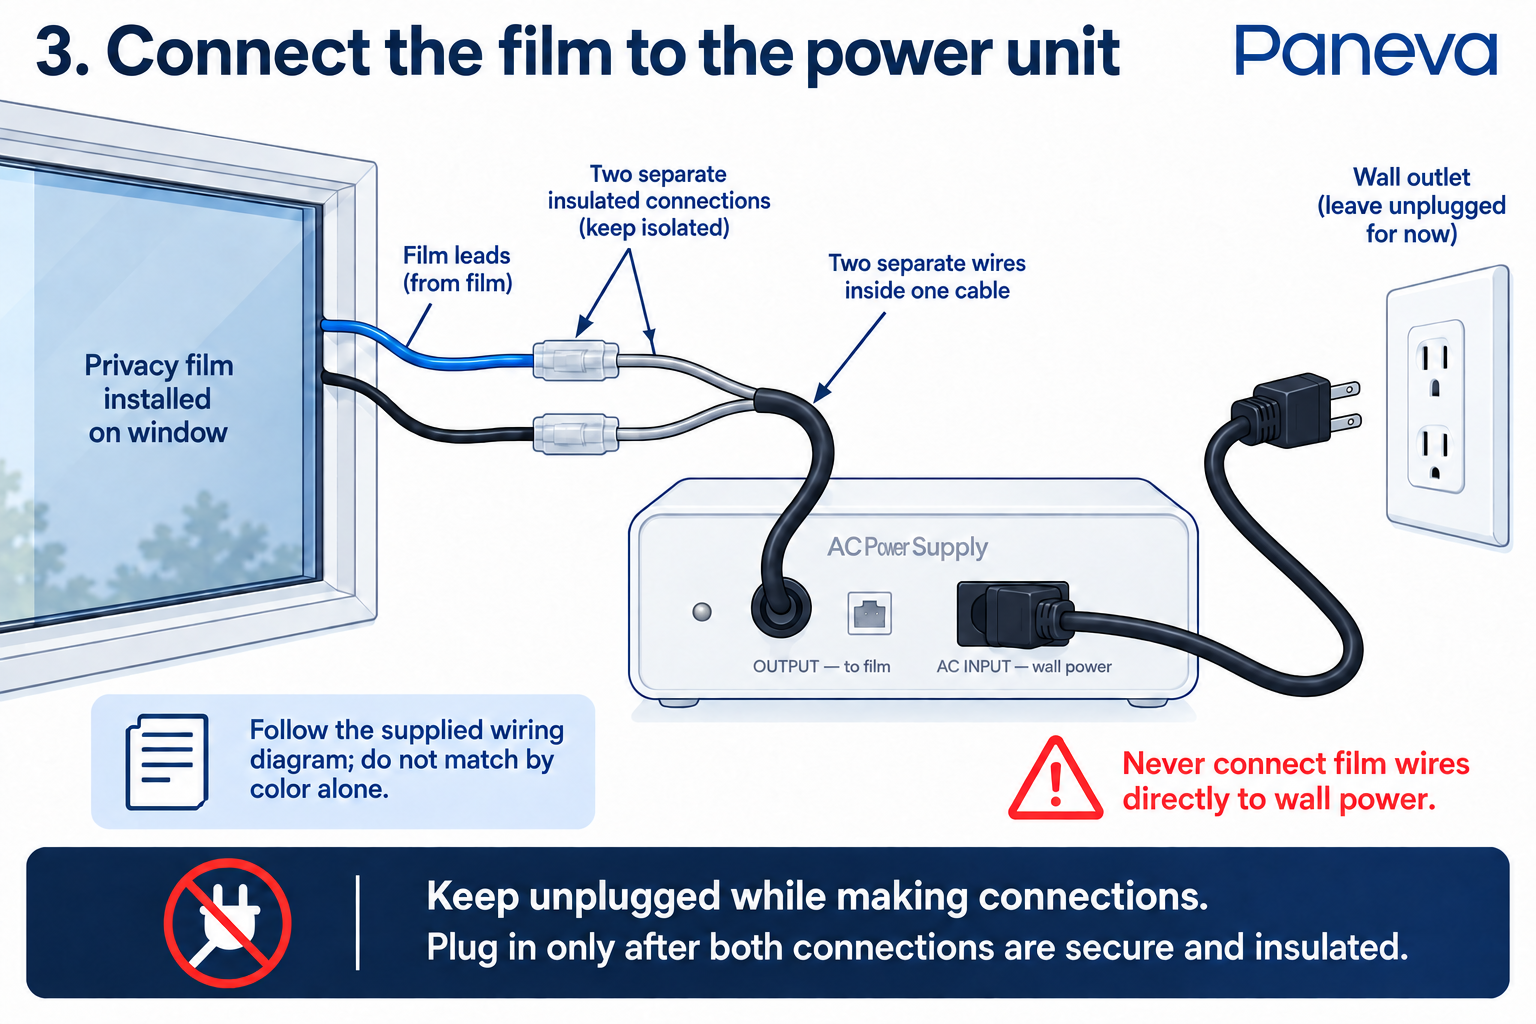
Keep the supplied transformer unplugged. Follow the labeled wiring diagram supplied with your exact kit. Join the two film leads to the corresponding transformer output leads using suitable insulated connectors, then connect the supplied power cord to a compatible outlet. Never connect film leads directly to household power. A qualified electrician must handle fixed building wiring.
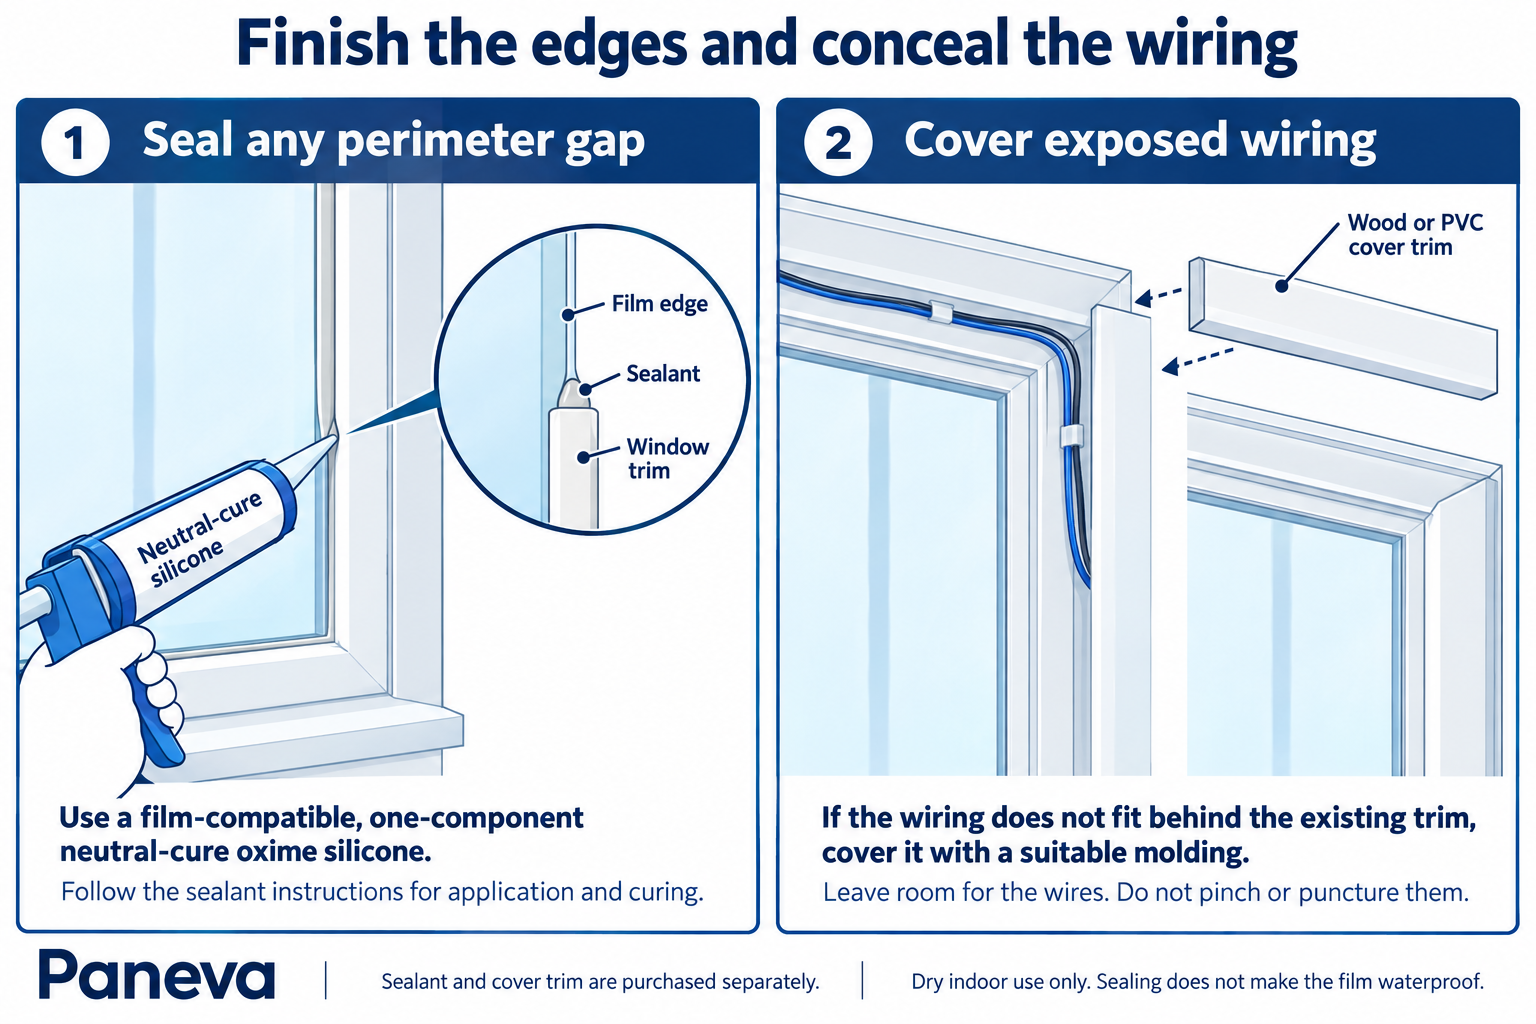
If needed, seal the clearance between film and frame with compatible one-component neutral oxime silicone, keeping electrical parts dry and accessible. If wiring cannot fit behind the glazing bead, cover it with a suitable wood or PVC trim without pinching or piercing the cable. Silicone and trim are not included in the kit.
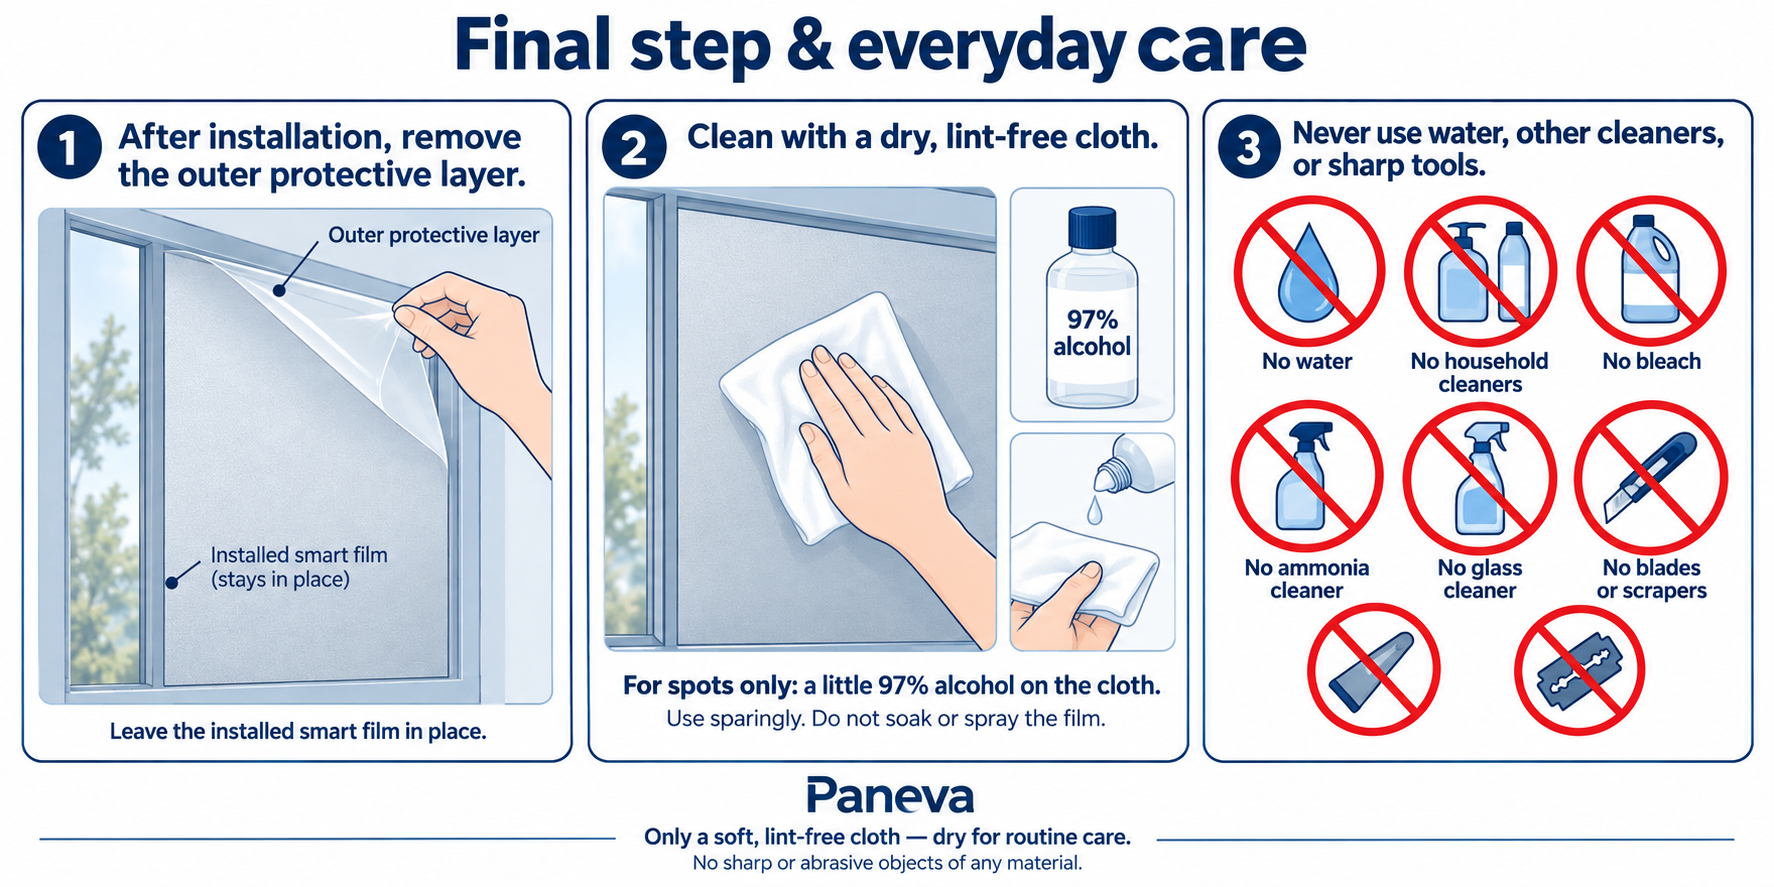
After installation, remove the outer protective layer with your fingers. Keep blades and sharp tools away. Disconnect power before cleaning. Use only a dry lint-free cloth; for a small spot, lightly dampen the cloth with 97% isopropyl alcohol. Never spray the film or use water, soap, bleach, ammonia or glass cleaner.
Turn the system off before cleaning. Use only a dry, soft, lint-free cloth. For a small spot, lightly dampen the cloth with 97% isopropyl alcohol. Never soak or spray the film. Keep the edges, busbars and electrical parts dry. Never use water, soap, bleach, ammonia, glass cleaner, blades, scrapers, cutters or any sharp object on the installed film.
Questions or incidents: call (901) 665-3444 or email smartglass@smartglass.icu. Keep your order number and photos ready if you need to make a claim.